Setup & admin
Your BukaTime Website
Every studio gets a working website the moment it goes live. Here is how to make it yours.
You do not have to build anything. The moment your studio goes live, BukaTime gives you a website at https://[your-slug].bukatime.com with your services, prices, opening hours and a booking button already on it. It stays current on its own — add a service, and it appears.
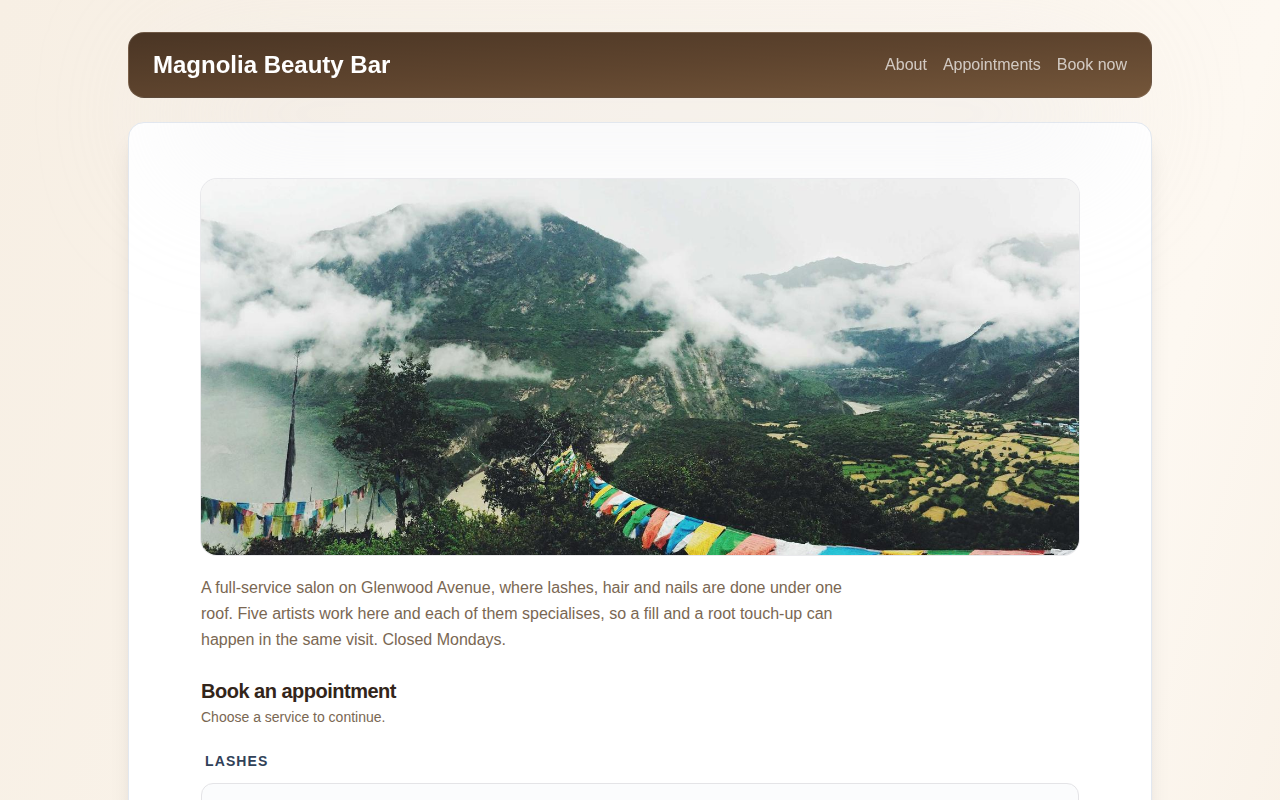
Everything below is optional. It is the difference between a page that works and a page that looks like yours.
Already have a website? You can keep it and put the booking widget on it instead — see Adding the Booking Widget to Your Website. Plenty of studios do both: the widget on their own site, and the BukaTime site as a link for social profiles.
Where to Change It
Go to Studio Configuration → Website. The top of that page shows your web address, a View site button, and a short list of what your site is currently showing:
- Services and prices — always there.
- About page — appears once you write a description or add an About photo.
- Portfolio page — appears once you add at least one photo.
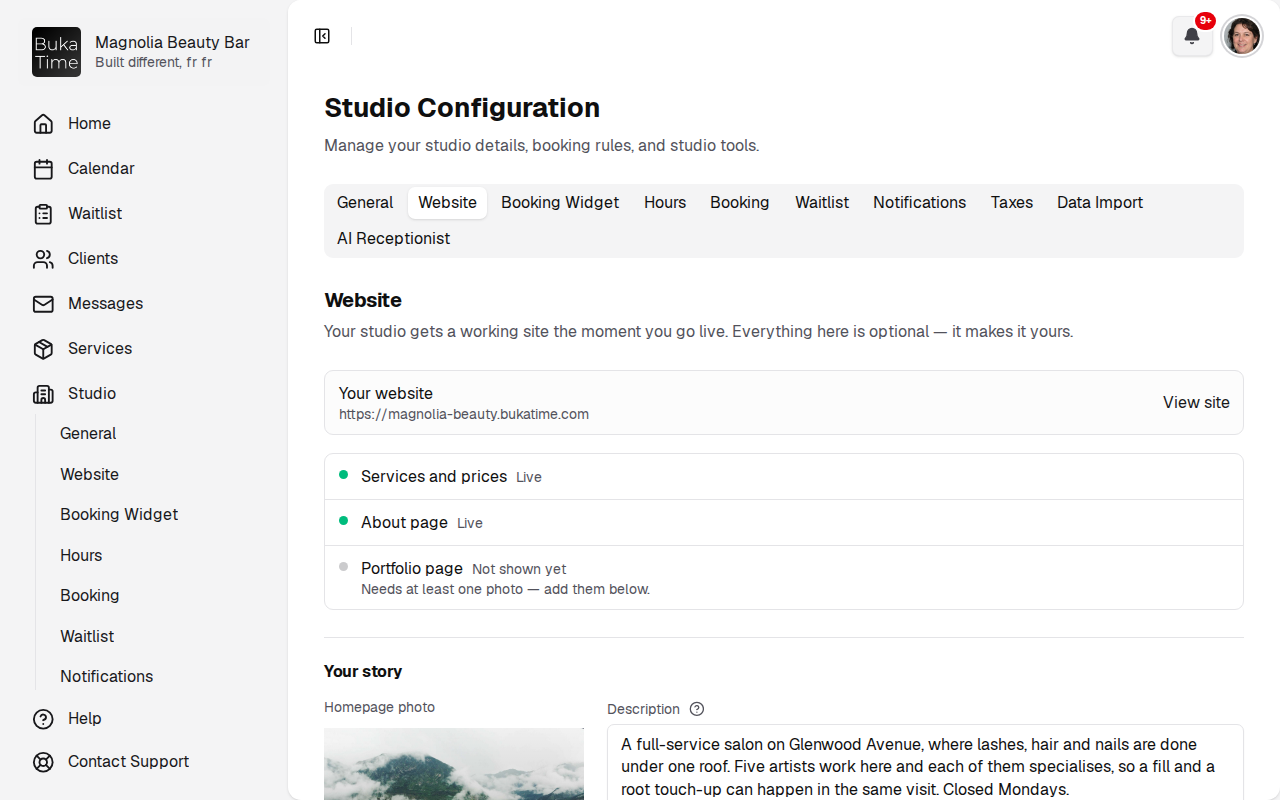
A page you have not filled in is not shown to clients at all, and no empty page is put in front of Google. Nothing is half-built in public.
Your Story
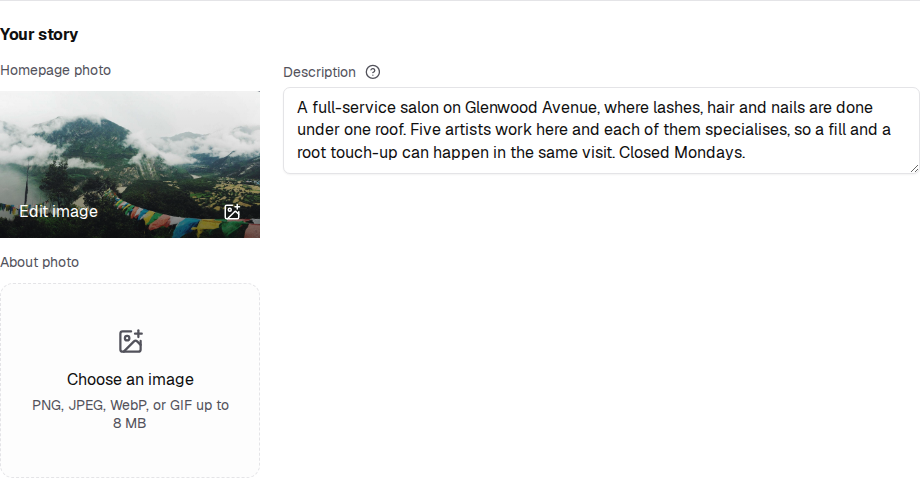
The description is the first thing a client reads, and it is what creates your About page. Two or three sentences is plenty: who you are, what a visit is like.
Write it as you would say it out loud. "A one-chair lash studio on Central Avenue. Every set is mapped and applied by Callie, the owner" tells a client more than a paragraph of adjectives.
Photos
Three kinds, all optional, all on the Website tab:
| Photo | Where it appears |
|---|---|
| Homepage photo | The banner at the top of your main page |
| About photo | The top of your About page — leave it empty and your homepage photo is used |
| Portfolio photos | A gallery on its own Portfolio page |
Portfolio is where your work goes. One photo is enough to make the page appear; a dozen makes it worth browsing.
Colour Scheme
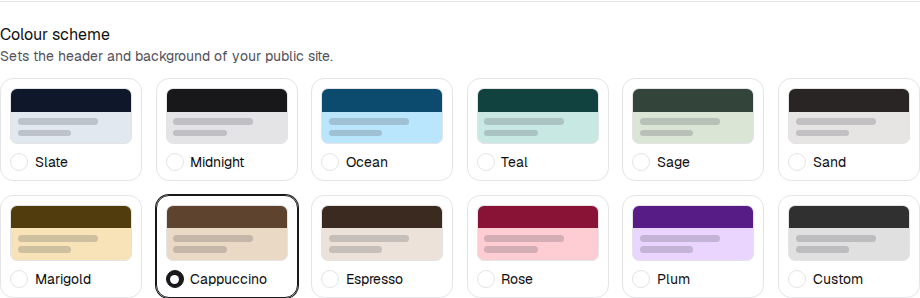
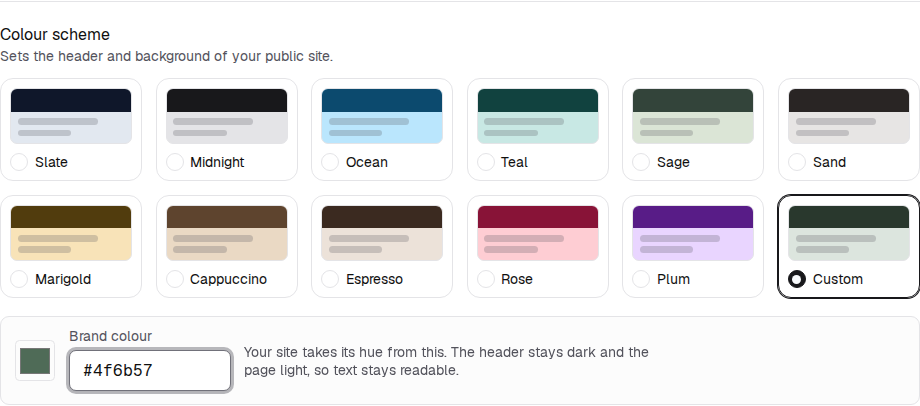
Eleven schemes, plus a custom one:
Slate · Midnight · Ocean · Teal · Sage · Sand · Marigold · Cappuccino · Espresso · Rose · Plum
Slate is the default. Pick another and your site's header, background and accents change together — click View site to see it.
Custom
Choose Custom and enter your brand colour as a hex code (#4f6b57), or use the colour picker beside the field.
Your site takes its hue from that colour, not the colour itself. The header stays dark, the page stays light, and the text stays readable no matter what you pick — so you can enter your exact brand colour without ending up with a page nobody can read.
Service List Layout
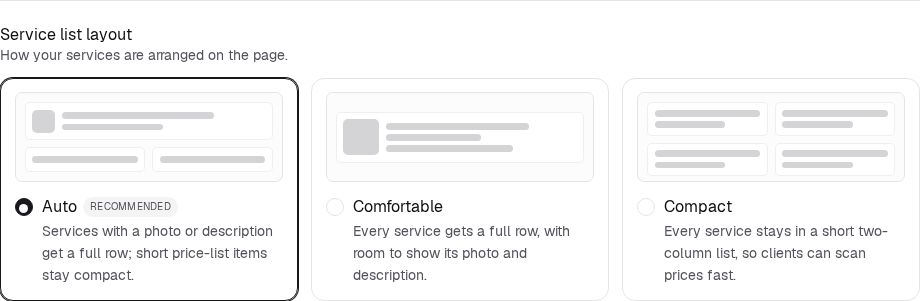
How your services are arranged:
- Auto (recommended) — services with a photo or description get a full-width row; short price-list entries stay compact. Most studios should leave this alone.
- Comfortable — every service gets a full row, with room for its photo and description. Good for a short menu you want to show off.
- Compact — everything stays in a short two-column list. Good for a long price list clients scan rather than read.
Your Team
If your studio has two or more providers, a Meet our team section appears automatically with their names and photos. A solo studio does not get one — there is no team to introduce.
Staff photos come from each person's profile, not from this page.
Being Found
Your main page, your About page and your Portfolio page can all be found on Google, and each carries your studio name, description and opening hours in the form search engines read.
Pages you have not filled in are left out deliberately. The fastest way to be findable is to write the description and add a few photos.
What Is Not on Your Website
Your booking policy is not shown on the About page. Clients see it during booking and in their appointment email, which is where it matters — and your AI receptionist answers policy questions from it. You set it under Studio Configuration → Booking.